
.png) Welcome to Week One of our Beginner Quilt series where we will be walking through every step together so you, as a beginner, can successfully make a gorgeous quilt! Today we are going to be talking about the tools and materials you will need to get started, and I have good news! I’m definitely a minimalist when it comes to investing in tools, so this won’t be a long list. Most things will link back to Amazon, so you can get everything for great price and shipped quickly so you’ll be ready for Week Two, when we start cutting our material.
Welcome to Week One of our Beginner Quilt series where we will be walking through every step together so you, as a beginner, can successfully make a gorgeous quilt! Today we are going to be talking about the tools and materials you will need to get started, and I have good news! I’m definitely a minimalist when it comes to investing in tools, so this won’t be a long list. Most things will link back to Amazon, so you can get everything for great price and shipped quickly so you’ll be ready for Week Two, when we start cutting our material.
Please note: Amazon links are considered affiliate links which means if you choose to buy by clicking my link, and I hope you will, Amazon will give me a few cents of the sale. The price is the very same, but it does help support my blog and these free tutorials I write!
The three most essential tools in any quilter’s life are the rotary cutter, cutting mat, and ruler. I never thought much about brands until I went to sewing conferences two years in a row and they had pretty crummy ones which led to a lot of cutting frustration.
So why is a cutting mat necessary? First, using a mat, cutter, and acrylic ruler together yields a perfect cut of fabric, and its extremely fast. Second, a good, self healing mat absorbs the cuts of the rotary cutter without wearing out the blade. If you try to substitute a cutting board, or a table or even the floor, not only will those surfaces be damaged, the blade of the rotary cutter will chip and dull swiftly. I absolutely love my Olfa cutting mat. I use the 24″ x 36″ size, (click HERE for that link) which has been a great investment. Of course, a 12″ x 18″ would be a cheaper and totally practical option for anyone starting out, plus it is a great size for traveling or just moving freely around your house. Olfa has these in some fun colors too! Check out this super cute aqua color!.jpg)
They also have it in PINK! Click HERE or on the picture to see it on Amazon. I’m going to order this color today so I have a smaller mat to use too! .jpg)
If you want something in between that you can grow with, there’s always the 18″x24″ size too! 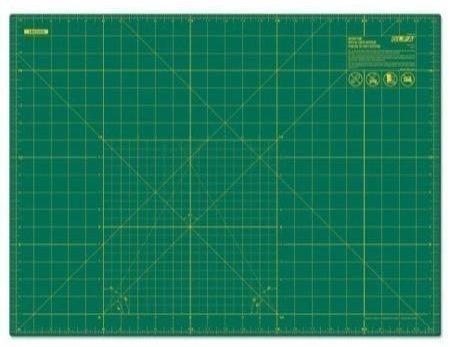
Onto rotary cutters- this is the cutting tool of the modern day quilter. As I mentioned above, using this pizza cutter-looking tool will save you loads of time and get you perfectly accurate cuts, which is extremely important in quilting, as good cuts of fabric set you up for success throughout process. I use an Olfa rotary cutter too. I started out with Fiskars which frustrated me to no end, so I was happy when a friend introduced me to Olfa which is easy to use, and cuts on the first try! These also come in a fun variety of colors, and I’m only going to link what I actually use because I don’t think its right to link things up that I don’t personally use every day.
I have this aqua color in the Olfa Splash 45 mm cutter. .jpg)
They also have it in PINK!.jpg)
And they have it in purple, which is so pretty!.jpg)
Rotary cutters do come in a larger 60mm size and a tiny 18mm size, but this is the standard size that you can use for just about anything! You won’t need blade refills right away, but keep this link handy, because its good to be able to get these at a good price, as they can get expensive if you aren’t careful. This is the refill pack I buy, and they are worth every penny of that price.
Onto the ruler! If you’ve ever been into a store that sells fabric and notions, you know that there are approximately 857,305 ruler options out there. I’m a simple girl, and there are only three sizes that I use, and I’m only going to link up two of them because they are the most practical. I use Omnigrid rulers because I like the way they are marked- down the 1/8″ and have guides for various angles. They are also very strong, and I don’t have to worry about my rotary cutter cutting up the edge of my ruler, which can happen with rulers that are not strong. PLEASE DO NOT TRY TO USE A SCHOOL RULER OR YARD STICK! You could slice off your fingers and get seriously injured. A good ruler like the ones I’m linking up will grip your fabric and prevent sliding around, so you get accurate cuts of fabric and you don’t run the risk of slipping and cutting yourself. Rotary cutter blades are extremely sharp, and you want to protect yourself and your project by having tools that help you cut carefully.
I love my Omnigrid 12.5×12.5″ ruler! Its a fantastic size, and so perfect for quilting projects. .jpg)
I also love the Omnigrid 9.5×24″ ruler. This one is so great for trimming up a quilt before adding binding. If you get a larger mat, I’d go with this ruler if you just want to get one. Either are fantastic and useful!
.jpg) Those are your basic, must have tools. I am pretty cheap and minimal, but I do not skimp on those. My husband always says “work smarter, not harder” and just these few things will help you to do that, and will keep you from frustration as you learn to sew and quilt.
Those are your basic, must have tools. I am pretty cheap and minimal, but I do not skimp on those. My husband always says “work smarter, not harder” and just these few things will help you to do that, and will keep you from frustration as you learn to sew and quilt.
If you have a sewing machine, chances are you also already have a seam ripper, but if not, this is a good one. It has a larger handle than the standard ones that come with machines which makes it easier to use when you do have to use it. I hate having to use any seam ripper, and I hope I can teach you some things to avoid having to use it, but when you do need it, there is no substitute, so best to have one on hand. I have this Dritz “deluxe” seam ripper. 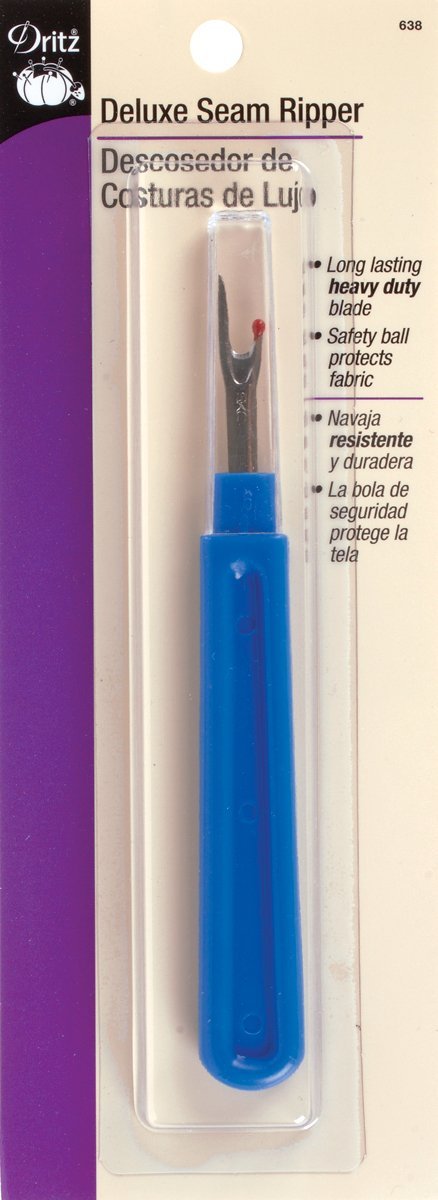
Its also very useful to have a good pair of scissors for cutting out batting and clipping threads. I never use scissors to cut fabric unless I’m trimming it off because they are not accurate like a rotary cutter.
Last week, when I mentioned this class to you, I told you my good friends at Jones & Vandermeer graciously agreed to partner up with me to offer you guys FULL KITS of the fabric you’ll need to make a quilt. We are going to be making granny square quilts in a baby size (or perfect for a wall hanging or on your couch) because its a simple design, but super classic and striking. The kits come with all the fabric you need for the front of the quilt plus the backing and binding! I chose all the fabrics, which was a load of fun, and I’ll be using these same kit selections to teach.
Want to know the very best part??? You are going to get a high end quilt for a low end cost! Because they cut only what is needed for the quilt, you save having to buy larger pieces than you need, so there will be virtually no waste involved. Want to know what’s even better??? (can you tell I’m totally excited about this?) All the kits feature a mix of great fabrics for quilting INCLUDING Liberty tana lawn, which is as fine as material comes. Its the best of the best, and it is paired with other great quilting fabrics that I’m excited to tell you about. They put together three quilt kits for my class here- they are super affordable (most shops charge a premium for kits, and J&V did not!), and J&V ships all domestic orders for free at a $60 threshold (so I’ve never paid for shipping! ha!). So if you just pick up a cute pair of thread snips with your kit, you should qualify for free shipping, and you’ll have a darling pair of scissors for clipping threads! HERE is a link if you want to peruse their selection.
The first kit is the Marquess Granny Square quilt kit. .png)
It is backed in a super cute gingham and bound with a light oyster colored solid.
The second kit is the Sky High Granny Square quilt kit. .png)
It is backed in a pretty grey cotton/linen and bound with a gorgeous navy Liberty lawn.
The last kit is the Ochre Pixelated Granny Square quilt kit. ![]() It is backed in a really pretty dusty blue cotton/linen and bound with a really cute ditzy floral grid.
It is backed in a really pretty dusty blue cotton/linen and bound with a really cute ditzy floral grid.
These will go fast, so go grab one if you want a full kit for our class!
Some final words for our first week- You will also need to get batting, but you don’t need it now, so I will wait to talk to you about that. Batting is the stuff that goes in the middle of your quilt to give it weight, body, and warmth.
This beginner quilt series is totally free, and is perfect for anyone of any age that can use a sewing machine. And if you don’t know how to use your machine, you will learn to as we go. I am making no assumption of prior knowledge, so as a total newbie, this is the class for you. I won’t make any money from this class, but do know that by purchasing from Amazon links, and just visiting my blog, you are helping to support me and keep things like this free. I do want to help you to learn and grow without charging a premium!
Next Friday, we will meet back here. You should have your fabric and cutting tools ready. In addition to step by step photo instruction, I will be filming a video for you to follow along with. Right now, the plan is to do that on Facebook, but I am also looking into YouTube. You will want to like my Facebook page to be notified of the video and you can find that HERE.
Please comment with any questions you have! I would love to help out in any way I can. :) I’m so excited to work with you over the coming weeks!
-Meredith

Hello! If the fabric bundle options aren’t quite what we want, are the measurements listed accurate for us to take to the fabric store with us?
Hi there, Kim! Let me write them here for you because a regular fabric store is likely to sell mainly 44” wide fabric which would change the measurements slightly since the Liberty lawn is wider.
From the center square outward:
1/4 yard (center) either a 1/4 strip or fat quarter cut is fine
1/4 yard (second fabric)
1/2 yard (third fabric)
1 yard (outermost fabric)
1 1/4 yard backing
1/2 yard binding
What is the cost to buy the kits? Also, do u use batting in between the top and backing of the quilt?
We will use batting, but I plan to talk more about that next week, so I haven’t mentioned it here. The kits are either $50 or $55, and there are just a few left. You can click right on the pictures to reach those links.
Meridith
I’m hoping that these classes and kits are still available.
I really want to start a beginner class. I’m getting my sewing machine on the 22nd of this month. When I get paid. Do you have any thoughts on machines. I’ve been making a couple purses and some layering fabrics. The “hand me down” machine doesn’t really work well with those jobs. Please let me know. Thanks kelley
I would love to take your class however I don’t do Facebook. Is there anywhere else you can find your class?
The classes in their entirety are written out here on my blog. The videos are only available on Facebook right now, but nothing is mentioned there that isn’t already laid out in the posts here on the blog. :)
[…] Learn to quilt […]
Is it best to always have squares instead of rectangles?
Do you mean for the quilt design? Rectangles are just as easy as squares. We have just gone with this design because it’s classic and straightforward, but you can certainly use rectangles instead if you can get the measurements down. :)